How to Generate and Use AWS Secret Keys
This section will guide you through the process required for creating a AWS SecretAccessKey and SecretKey and assigning the correct permissions to it.
Creating an AWS Secret Key with Credentials
Many features in Nocodo rely on secure integration with AWS services. To facilitate this, you'll need an AWS Secret Key with credentials. This allows Nocodo to interact securely with your AWS resources.
Follow these steps to create an AWS Secret Key with credentials:
-
Sign in to the AWS Management Console
Go to AWS Management Console and sign in with your AWS account credentials. If you do not have an AWS account, you'll need to create one. -
Navigate to the IAM (Identity and Access Management) Service
In the AWS Management Console, search for and select "IAM" from the services menu. This will take you to the IAM dashboard. -
Create a New IAM User
- On the IAM dashboard, click on "Users" in the sidebar, then select "Create user"
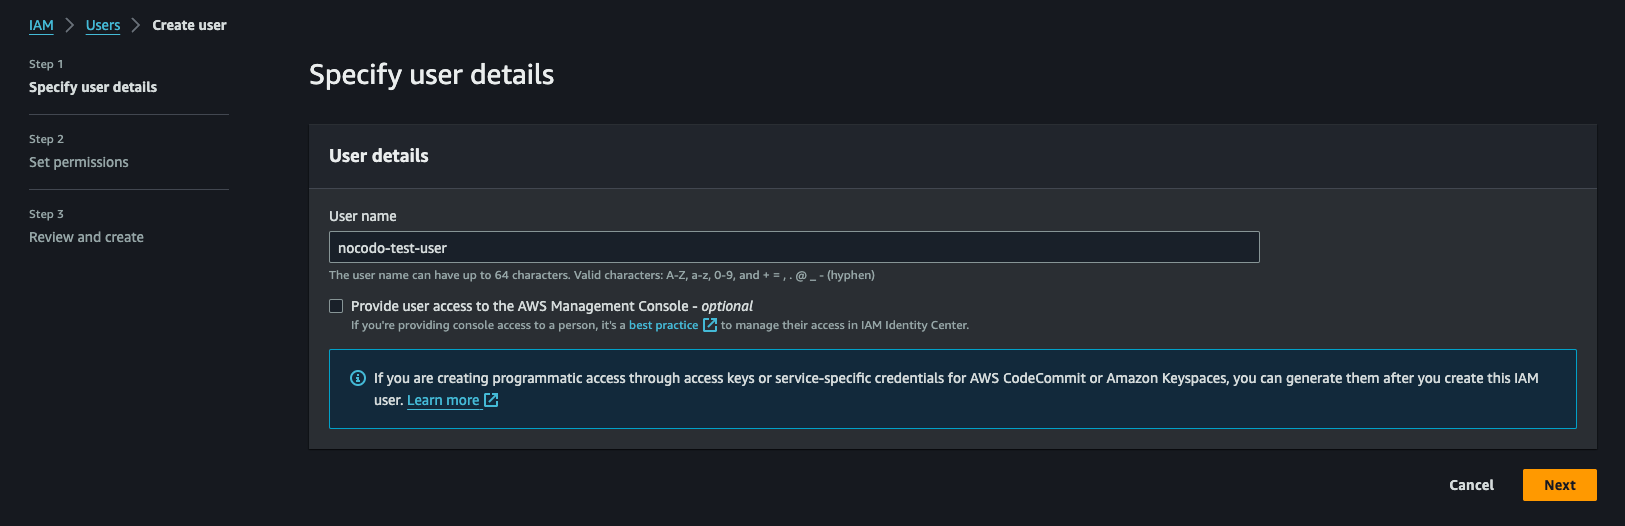
- Enter a user name (e.g., "nocodo-test-user").
- On the IAM dashboard, click on "Users" in the sidebar, then select "Create user"
-
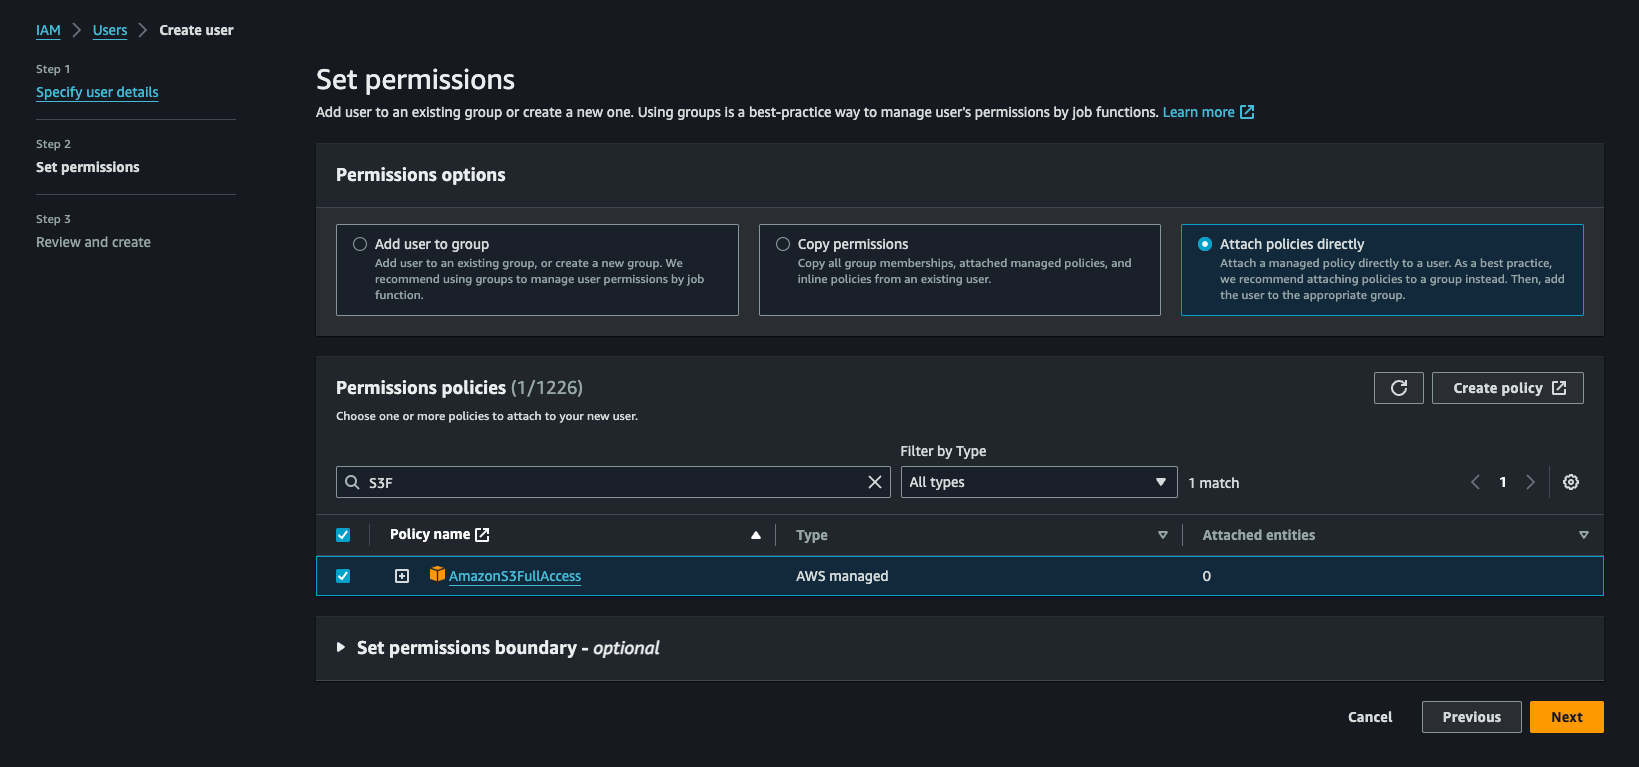
Set Permissions for the User
-
Click "Next" aws-
-
You can attach existing policies directly, add the user to a group with appropriate permissions, or create a custom policy. For a basic setup, you might choose "Attach existing policies directly" and select "AmazonS3FullAccess" (or any other specific permissions Nocodo might require).
-
Click "Next" to add any optional tags.
-
-
Review and Create User
- Review the user details and permissions.
- Click "Create user."
-
Download the Credentials
- Once the user is created, you'll see an option to 'Create access key' in the Summary section of the user.
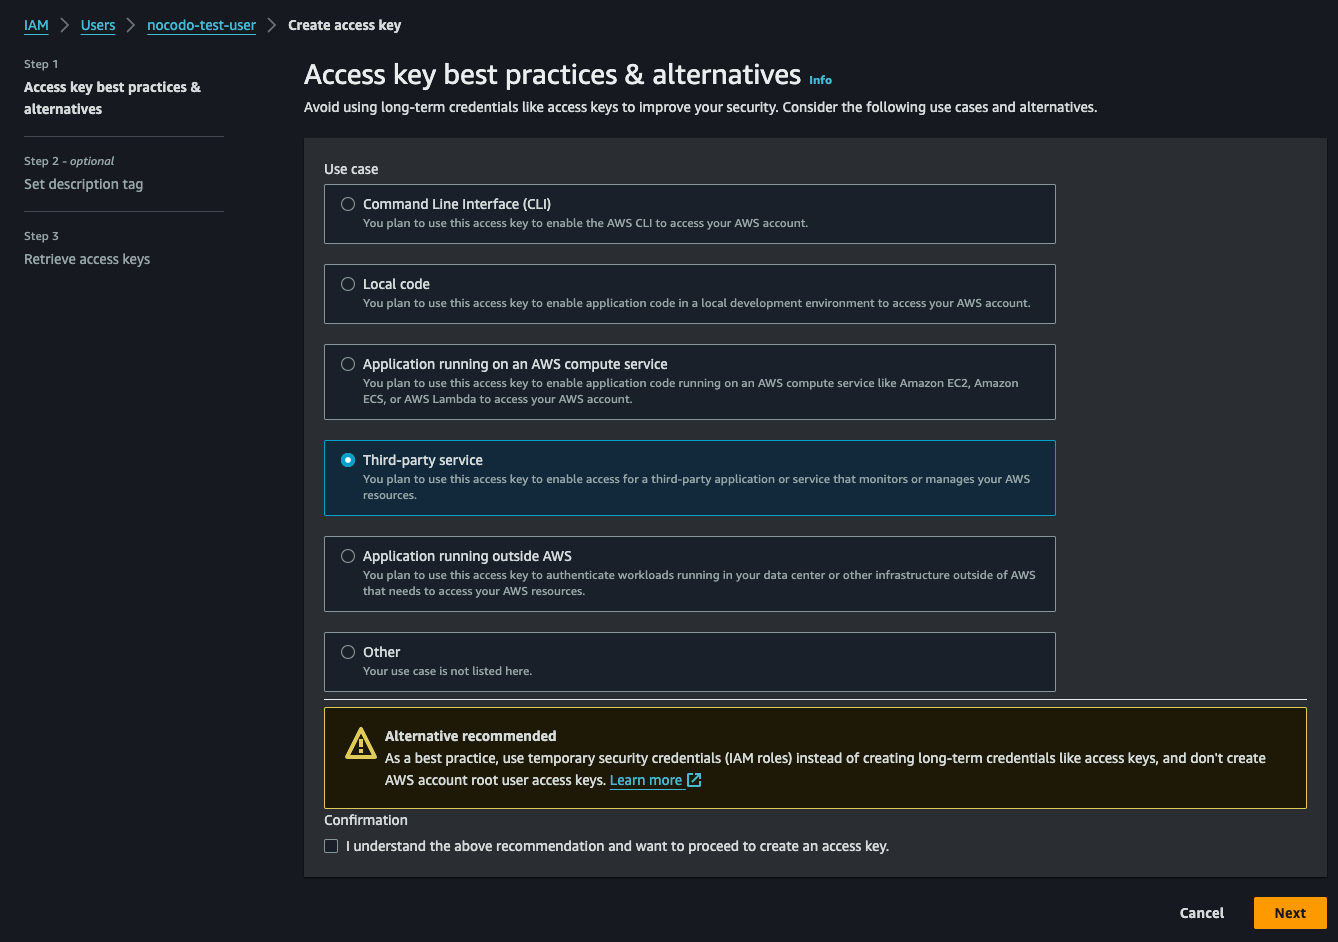
- Select the Use Case for the Access Key. Select 'Third-party service' and confirm that you understood the recommendations.
- In the next step add some tags or directly create the access key.
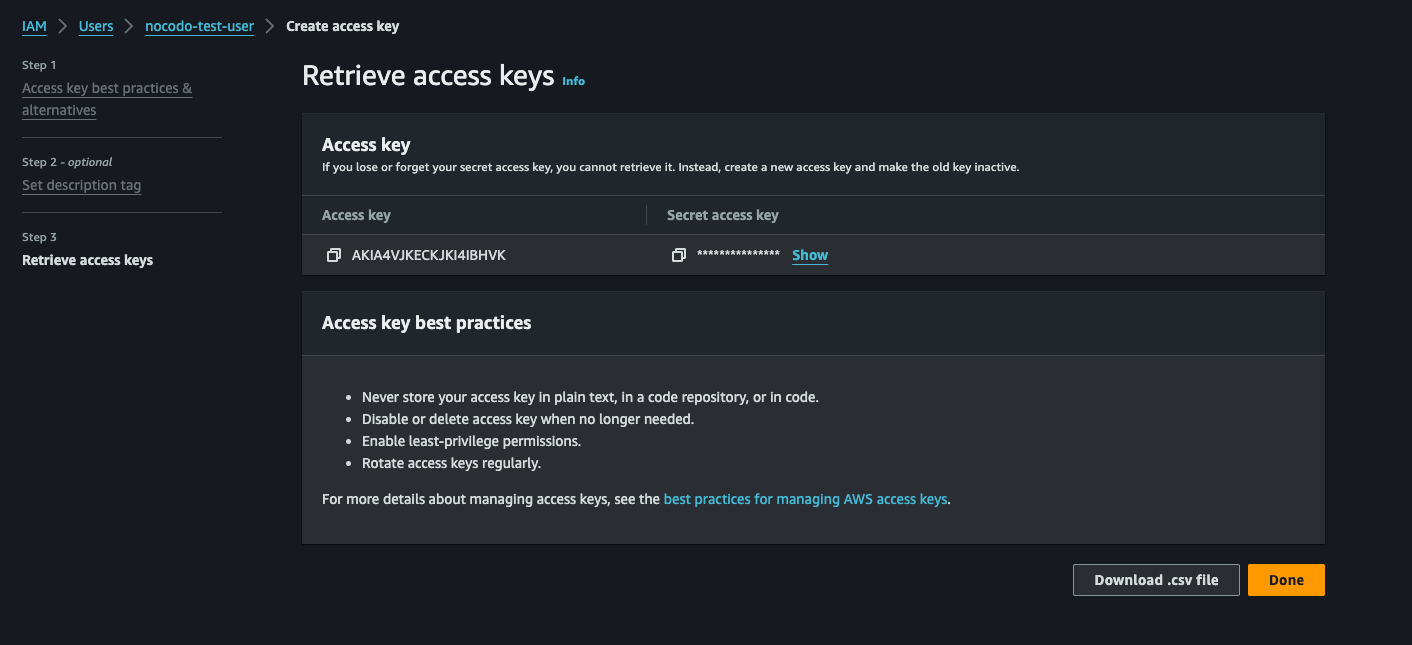
- In the following screen you are able to download the
.csvfile containing the Access Key ID and Secret Access Key. Download and securely store this file. This is the only time you will be able to view the Secret Access Key.
- Once the user is created, you'll see an option to 'Create access key' in the Summary section of the user.
-
Configure AWS Credentials in Nocodo
- With the credentials downloaded, you can now configure them in Nocodo. Follow the specific instructions in the Nocodo documentation to input these credentials into the system.
Important Security Note:
Keep your AWS Access Key ID and Secret Access Key secure. Only share them with trusted Persons or Applications. Rotate your keys regularly and delete any keys that are no longer needed. Nocodo AI stores your Credentials securely. The only way they can be accessed is when you execute your projects.