Text Input
Capture and dynamically integrate user-defined text in workflows
What is Text Input?
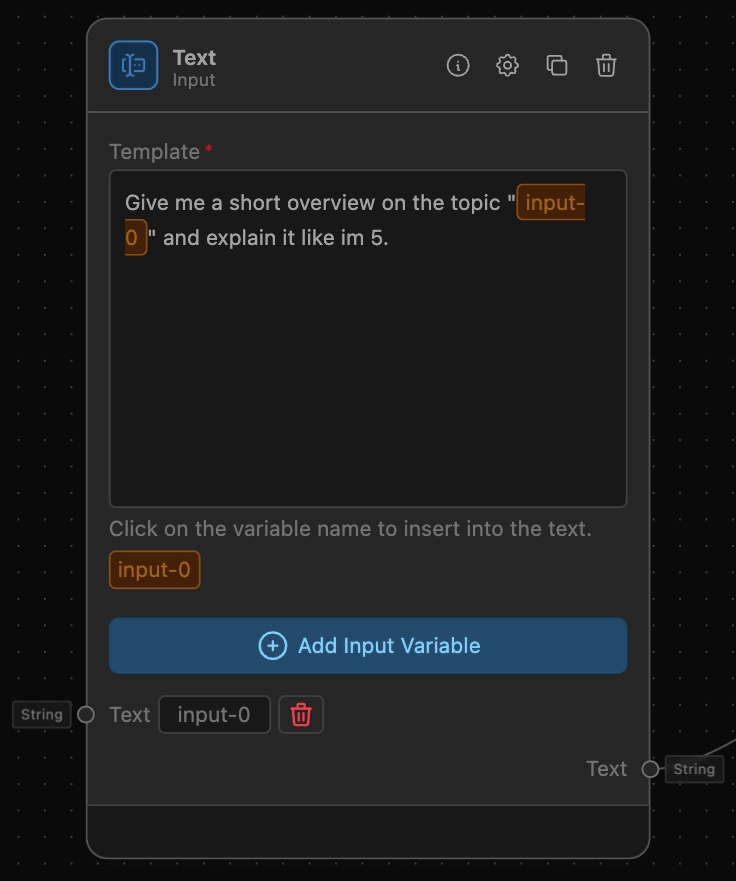
The Text Input node is a versatile tool that allows users to input text directly and dynamically integrate additional data through input anchors. It features a customizable text template for detailed content creation, and the capability to embed data dynamically from connected nodes.
How to use it?
To maximize the utility of the Text Input node in your workflow, follow these steps:
-
Configure the Template:
- In the 'Template' parameter, define the placeholder text or provide guidance on what users should input. You can include placeholders for data that will be dynamically inserted from other nodes.
-
Adding Input Anchors (Dynamic Data Integration):
- If your workflow requires dynamic data from other nodes, configure input anchors. These anchors can be linked to outputs from other nodes, allowing the Text Input node to receive and embed this data directly into the text template.
- Example: If connected to a API-Input node, you can insert the current user input into a report.
-
Connecting the Node:
- Connect the 'prompt' output anchor to any subsequent node that processes or utilizes the string, such as data processors, language models, or output nodes.
- Ensure that the data types and content expected by the connected node align with the output from the Text Input node.
Example of usage
Example Taks: Creating a Customized Report with Dynamic Data
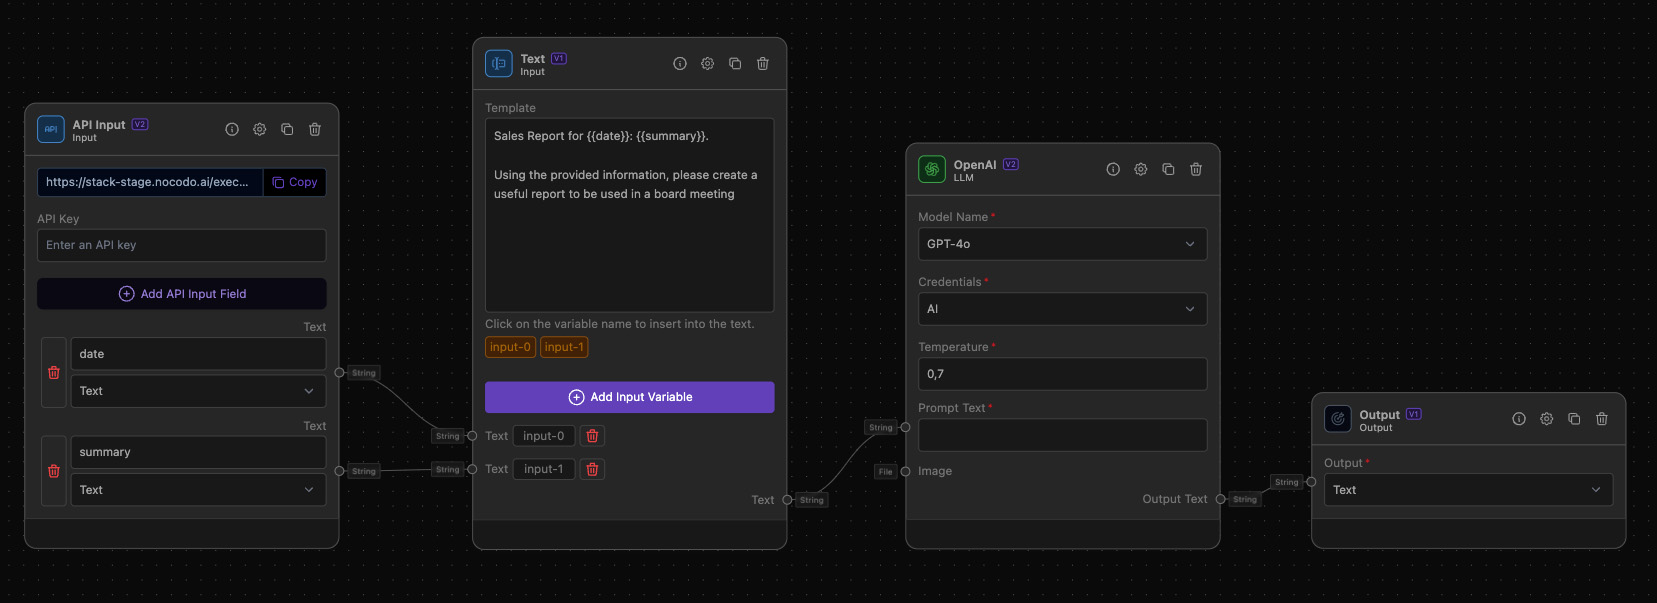
Objective: Imagine a scenario where a user inputs a summary, and the workflow enriches this summary with data fetched from a CRM system.
Step-by-Step Guide
-
Set up the Text Input Node:
- Define a template such as "Sales Report for {{date}}: {{summary}}."
-
Configure Input Anchors:
- Add two input anchors: one for 'date' and one for 'summary' (where the user inputs text). Both can be outputs from the API-Input node.
- These placeholders within the template will be replaced by actual data when the workflow executes.
-
Process and Display the Output:
- Connect the output of the Text Input node to an OpenAI LLM node to enhance the report with AI-generated insights.
- Further, connect the output of the LLM to a String Output node to display or store the final report.
Additional information
Using input anchors in the Text Input node allows for the creation of highly dynamic and responsive input fields within workflows. It's essential to map the correct data types and ensure that all nodes connected upstream are configured to pass the correct data into the Text Input node. This setup encourages a seamless flow of data and reduces manual input errors, enhancing automation and efficiency.