OpenAI DALL-E
Generate images from textual descriptions using OpenAI's DALL-E models.
What is OpenAI DALL-E?

OpenAI DALL-E is a powerful tool that generates images from textual descriptions, also known as prompts. This functionality allows users to create high-quality images tailored to their needs by specifying various parameters such as model version, image size, quality, and style.
How to use it?
To use OpenAI DALL-E, follow these steps:
-
Add OpenAI DALL-E to your workflow:
- Drag and drop the OpenAI DALL-E node into your workflow canvas.
-
Configure the OpenAI API Key:
- Enter your OpenAI API key in the "OpenAI API Key" field. This key is required to authenticate requests to the OpenAI API.
-
Select Model Name:
- Choose between "DALL-E 2" or "DALL-E 3" from the "Model Name" dropdown. The options for image size, quality, and style will change based on your selection.
-
Configure Image Parameters:
- For "DALL-E 2":
- Size: Select from 256x256, 512x512, or 1024x1024.
- For "DALL-E 3":
- Size: Select from 1024x1024, 1792x1024, or 1024x1792.
- Quality: Choose between Standard or HD.
- Style: Select Vivid or Natural.
- For "DALL-E 2":
-
Set the Prompt Text:
- Connect a node that provides a text string to the "Prompt Text" input anchor. This text will be used as the prompt for image generation.
Example of usage
OpenAI DALL-E can be used for various tasks such as creating illustrations, generating concept art, or visualizing ideas from textual descriptions.
Example Task: Generate Concept Art
Objective: Create a concept art image based on a descriptive text prompt.
Step-by-Step Setup
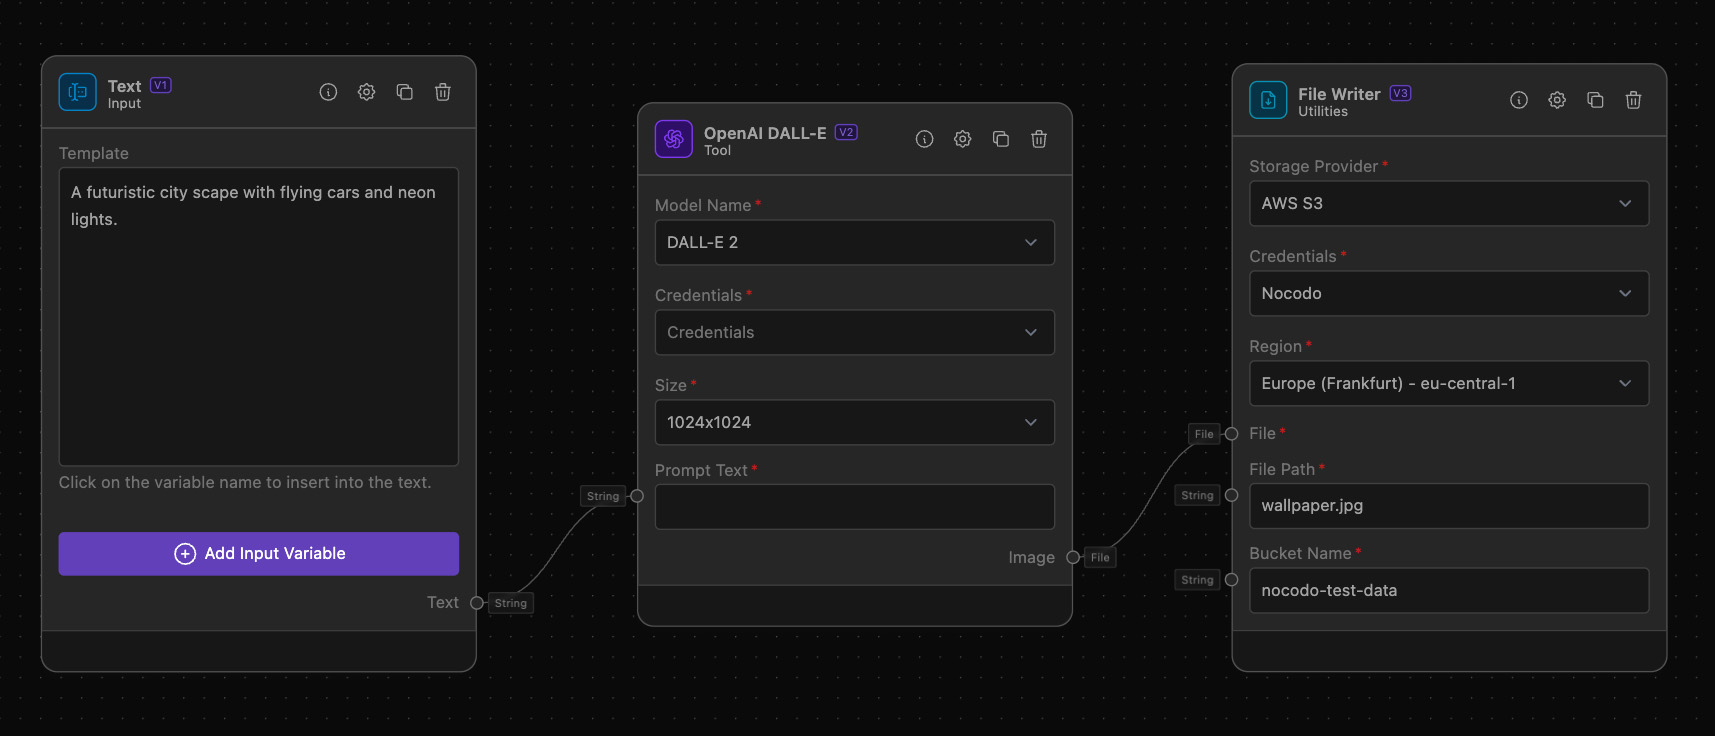
-
- Add a "Text" node and enter a descriptive prompt, e.g., "A futuristic cityscape with flying cars and neon lights."
-
Configure OpenAI DALL-E:
- Drag and drop the OpenAI DALL-E node into the workflow.
- Enter your OpenAI API key in the "OpenAI API Key" field.
- Select "DALL-E 3" as the model name.
- Choose "1024x1024" for size, "HD" for quality, and "Vivid" for style.
-
Connect Nodes:
- Connect the "Text" output to the "Prompt Text" input anchor of the OpenAI DALL-E node.
-
Output Results:
- Add a File Writer to store the generated image in your S3 Bucket.
- Connect the "Image" output anchor of the OpenAI DALL-E to the File Writer.
Additional Information
To use OpenAI DALL-E effectively, ensure that your API key has the necessary permissions. For the best results, craft detailed and specific prompts to guide the image generation process. Below is an example of a detailed prompt that can yield high-quality images:
Example Prompt: "A serene beach at sunset with gentle waves, palm trees, and a hammock swaying between them. The sky is painted with shades of orange, pink, and purple, reflecting on the water."
By following the steps outlined in this guide, you can harness the power of OpenAI DALL-E to generate stunning images from your textual descriptions.